| This process Addresses the Mechanical Disassembly of the Robot and does not address the Electronics. Accompany this Procedure is additional pictures that you can expand to see more details as needed. This Robot has IC's and Transistors and are of the earlier designs. Static discharge can damage the electronics. It is recommended that you have and use a Static grounding wrist strap. |
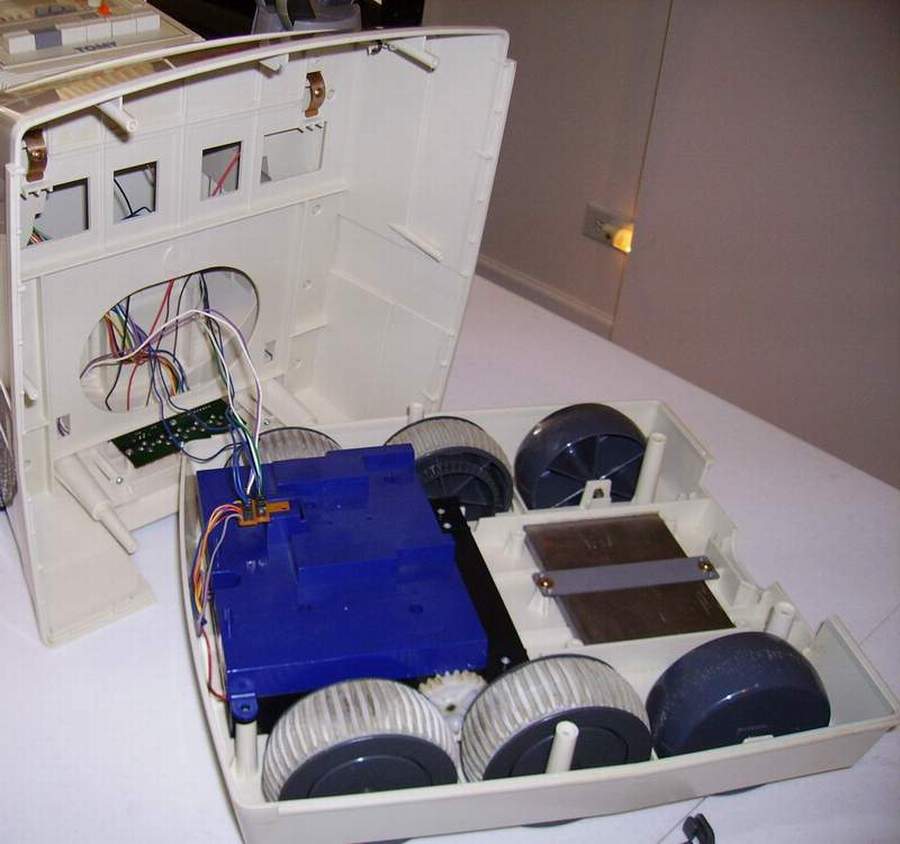
The Omnibot ® 2000 Drive Train
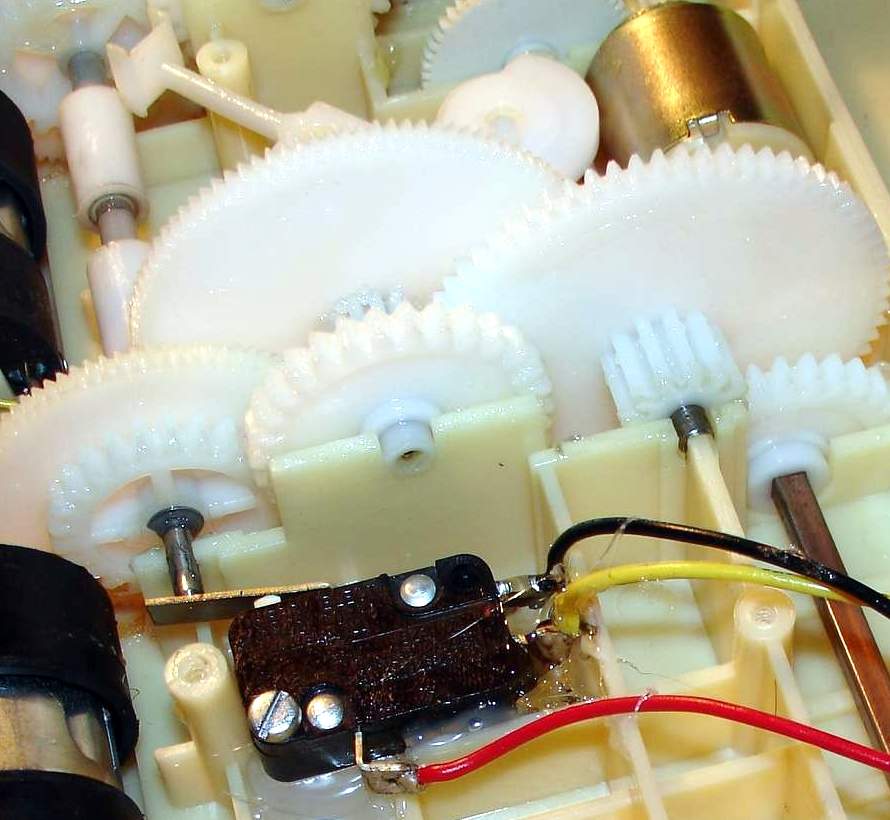
Omnibot 2000 Drive Train |
Omnibot 2000 Drive Train |
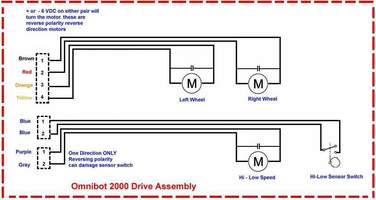
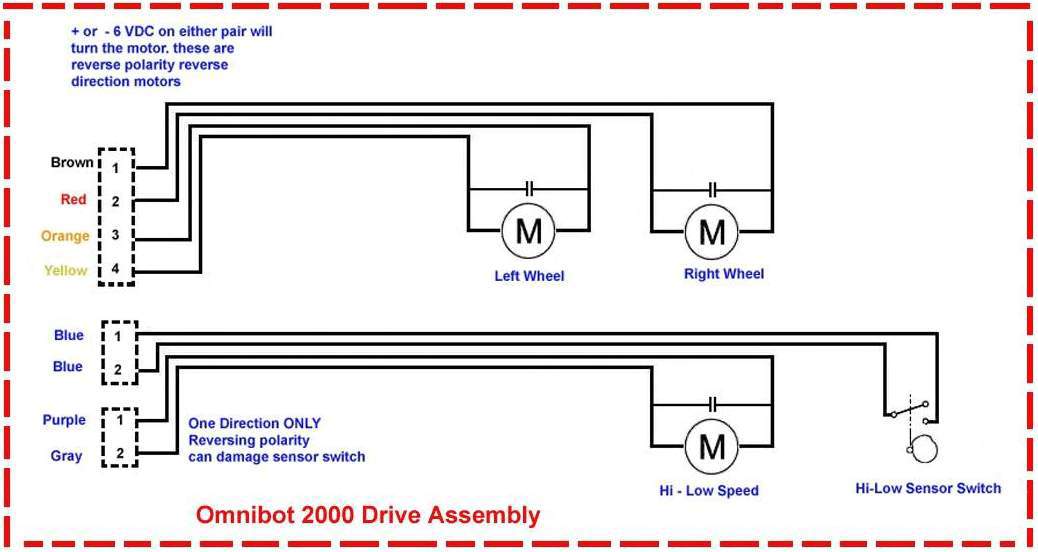
Omnibot 2000 Drive Train Schematic |
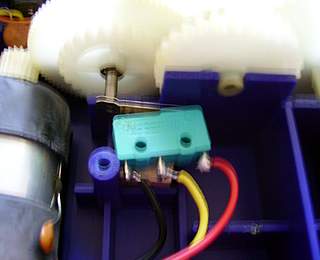
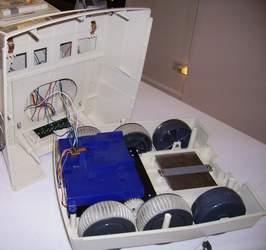
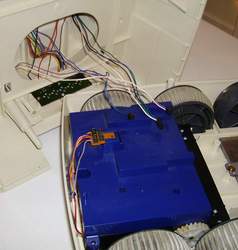
Pictures of the Omnibot ® 2000 Drive Train
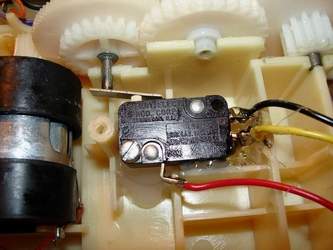
Omnibot 2000 Drive Train
Click to Enlarge |
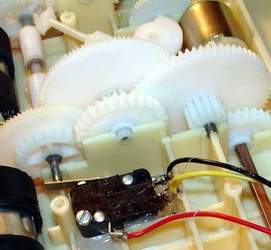
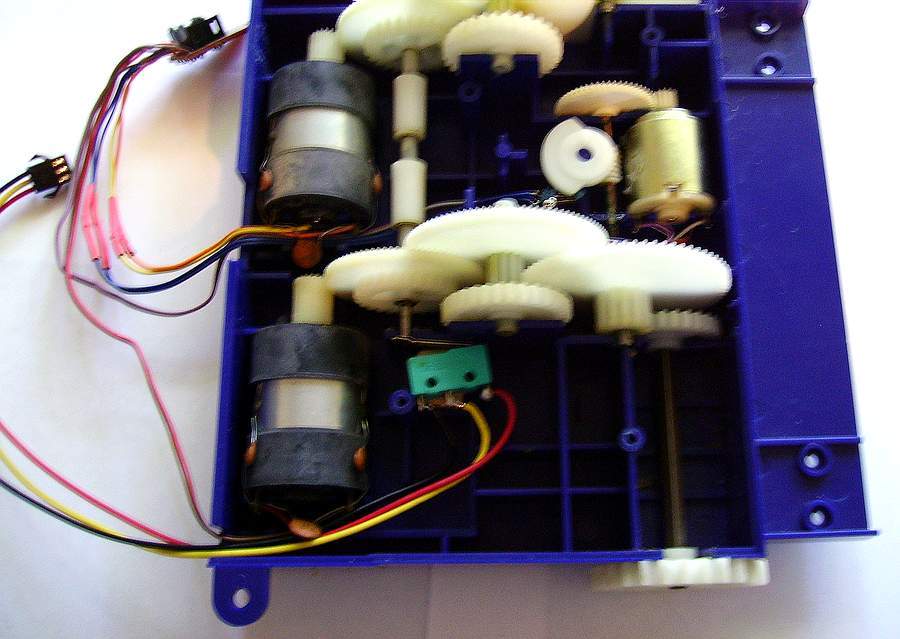
Omnibot 2000 Drive Train
Click to Enlarge |
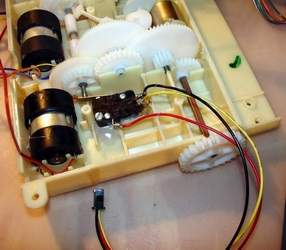
Omnibot 2000 Drive Train
Click to Enlarge |
We will start from the point that the robot has been dissassembled and the drive train is seperate from the rest of the parts. ( See Omnibot 2000 Dissassembly Procedure covered seperately)
| There is no warrenty expressed or implied with this procedure. By using any information from this web site, you agree not to hold responsible this site, me, nor any of its representatives, for any injuries and/or damages, both physical and/or psychological, that may arise from the use and/or misuse of anything derived from this site. The user further agrees that such information/pictures does not constitute any guarantee of accuracy, safety or reliability, and that cannot be held responsible for any way. The user agrees to proceed at their own risk.
|
Source: My Collection - Updated 2-5-2009
|